Coreboot update
Nikita Gusarov
It seems that I’ve taken quite a long time since the last post to return here. Such a long pause is mainly explained by my work on the thesis and participation in the Discrete Choice Analysis (DCA) school organised at EPFL. Probably I should make some posts with a more academic content, but it’s something for future projects.
Today I wanted to document the procedure for updating a Coreboot firmware on my X220. To give some context I should say that after I bought the laptop the summer of 2021, I nearly immediately swapped the proprietary Lenovo BIOS for the Coreboot. At that time it was done mostly for testing purposes, but as it worked pretty fine I started to use the X220 as my main laptop. Now I’ve decided to explore the procedure a little more.
Coreboot
From the project’s description we know that:
Coreboot is an extended firmware platform that delivers a lightning fast and secure boot experience on modern computers and embedded systems. As an Open Source project it provides auditability and maximum control over technology.
The complete documentation is freely accessible, but risks to be quite difficult to digest for novices. In this post I’ll focus on an easy “how to” for an X220 ThinkPad. Keep in mind, that the described procedure is valid only for an X220 already running a Coreboot firmware (a guide for a fresh install will be done in future, I hope).
Build procedure
Assuming we are using [Arch] based system, we will need the build toolset first:
sudo pacman -S base-devel curl git gcc-ada ncurses zlib
The next step is to clone the Coreboot source tree:
git clone https://review.coreboot.org/coreboot && cd coreboot
And build the Coreboot toolchain. Because the i386 toolchain is currently used for all x86 platforms (including x86_64) we stick to it:
make crossgcc-i386 CPUS=$(nproc)
If we want to use additional payload with SeaBIOS in our Coreboot, we should build them at this step:
make -C payloads/coreinfo
Afterwards it remains to create a configuration file for our build:
make menuconfig
Or
make nmenuconfig
Under mainboard tab we select Lenovo as vendor and ThinkPad X220 as our target mainboard model. To check the configuration afterwards one may execute:
make savedefconfig
cat defconfig
Once the configuration is complete, it remains only to build our .rom:
make
The resulting image will be stored as build/coreboot.rom.
Configuring bootsplash image
On the recent version of Coreboot it became quite easy to add and modify the bootsplash images. It remains to export the desired image as JPG with the following parameters:
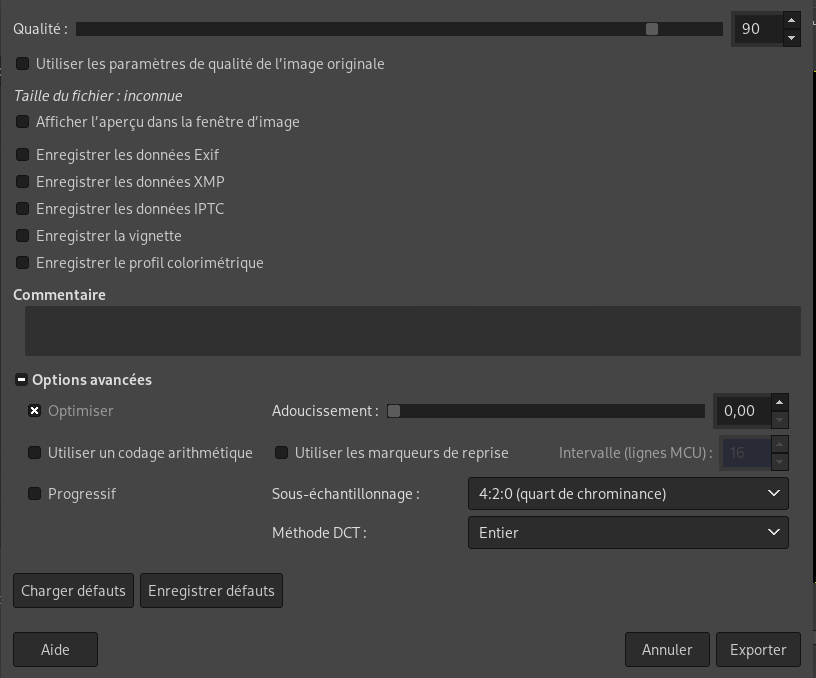
Please, have in mind that as suggested in this blogpost the image should be “1024px wide and 768px tall” precisely. I’ve tested it with native 1366x768 resolution and it didn’t work. Contrary to some other experiences in my case the image was aligned to upper left corner of the screen without any additional transformations (not scaled to 16:9 ratio).
Then, in the Coreboot configuration file it remains to indicate the path to the saved JPG file.
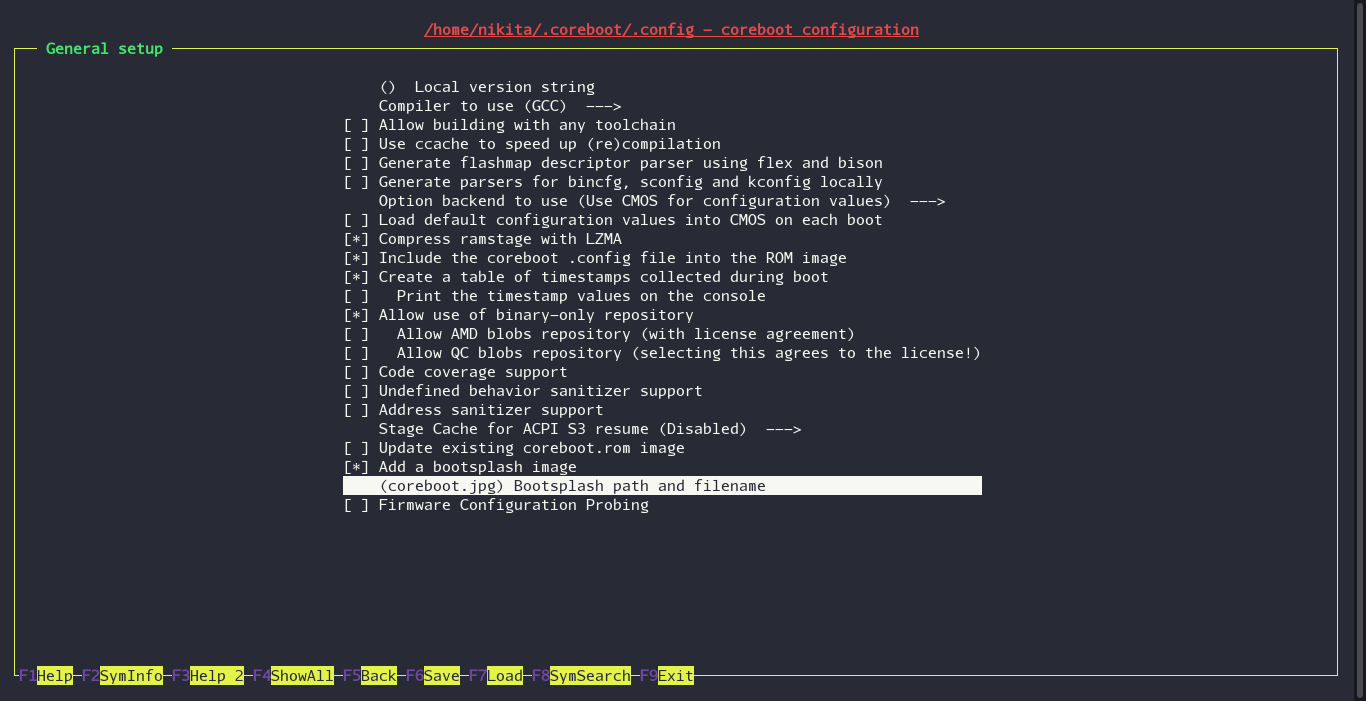
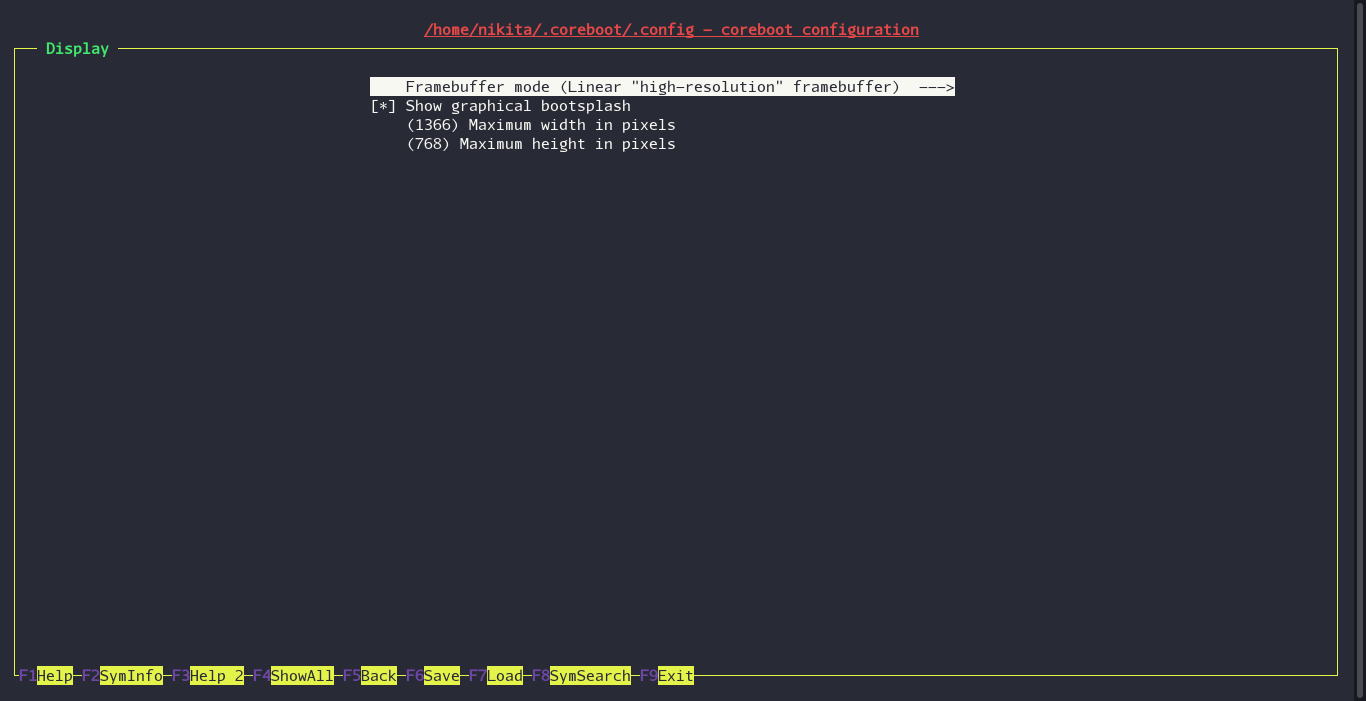
Keep in mind, that path indication will only add the desired image to the generated .rom file. To display it, we should configure it separately:
Internal flashing
WARNING! Proceed at your own risk! Be sure to have a Pomona clip handy in case you mess up.
Finally, we should write the newly built Coreboot image to our device.
For this we will use the flashrom utility.
In order to use flashrom internally run:
sudo modprobe -r lpc_ich
Or boot with kernel option iomem=relaxed.
It’s advised to make a backup image before proceeding:
sudo flashrom -p internal:laptop=force_I_want_a_brick -r old.rom
Keep this on some other device and make sure to have a SPI Programmer device and Pomona clip at hand (just in case).
For best reliability read several images and check them with diff command.
Now, once you have a fall-back plan ready, proceed with writing the new image. Because we have built our image without any additional blobs (such as Intel ME), we should be careful to overwrite only the BIOS region:
sudo flashrom -p internal:laptop=force_I_want_a_brick -w build/coreboot.rom --ifd --image bios
If the verification is passed, reboot and enjoy the updated firmware.